Solar Ledger App Guide
Introduction
This guide will help you get started in using your Ledger hardware wallet with the Solar Desktop Wallet software. Your Ledger device uses an offline, or cold storage, method of generating private keys, making it among the most secure ways to store cryptoassets, including Solar (SXP).
With this enhanced security, your private keys remain offline and all transactions require physical confirmation on your device, protecting your funds from online threats and malware. It enables you to sign transactions securely, so you can send SXP or vote for your favourite block producers without the need to enter your mnemonic.
Before you start
This guide assumes you have the following set up, updated to the latest versions, and ready to use:
- A Ledger hardware wallet: https://shop.ledger.com
- Ledger Live: https://www.ledger.com/ledger-live/download
- Solar Desktop Wallet: https://solar.org/desktop-wallet
Supported Devices
- Ledger Nano X
- Ledger Nano S Plus
- Ledger Stax
- Ledger Flex
Info
Make your Ledger device's firmware is updated to the latest version through Ledger Live before proceeding with installation of the Solar app.
Installing the Solar Ledger App
You can find and install the Solar Ledger app using Ledger Live.
1. Connect your device to Ledger Live
To get started installing the Solar Ledger app, you'll need to connect your device to Ledger Live:
- Open Ledger Live Desktop.
- Click 'My Ledger' in the side menu.
- Connect your Ledger device to your computer and unlock it using your PIN.
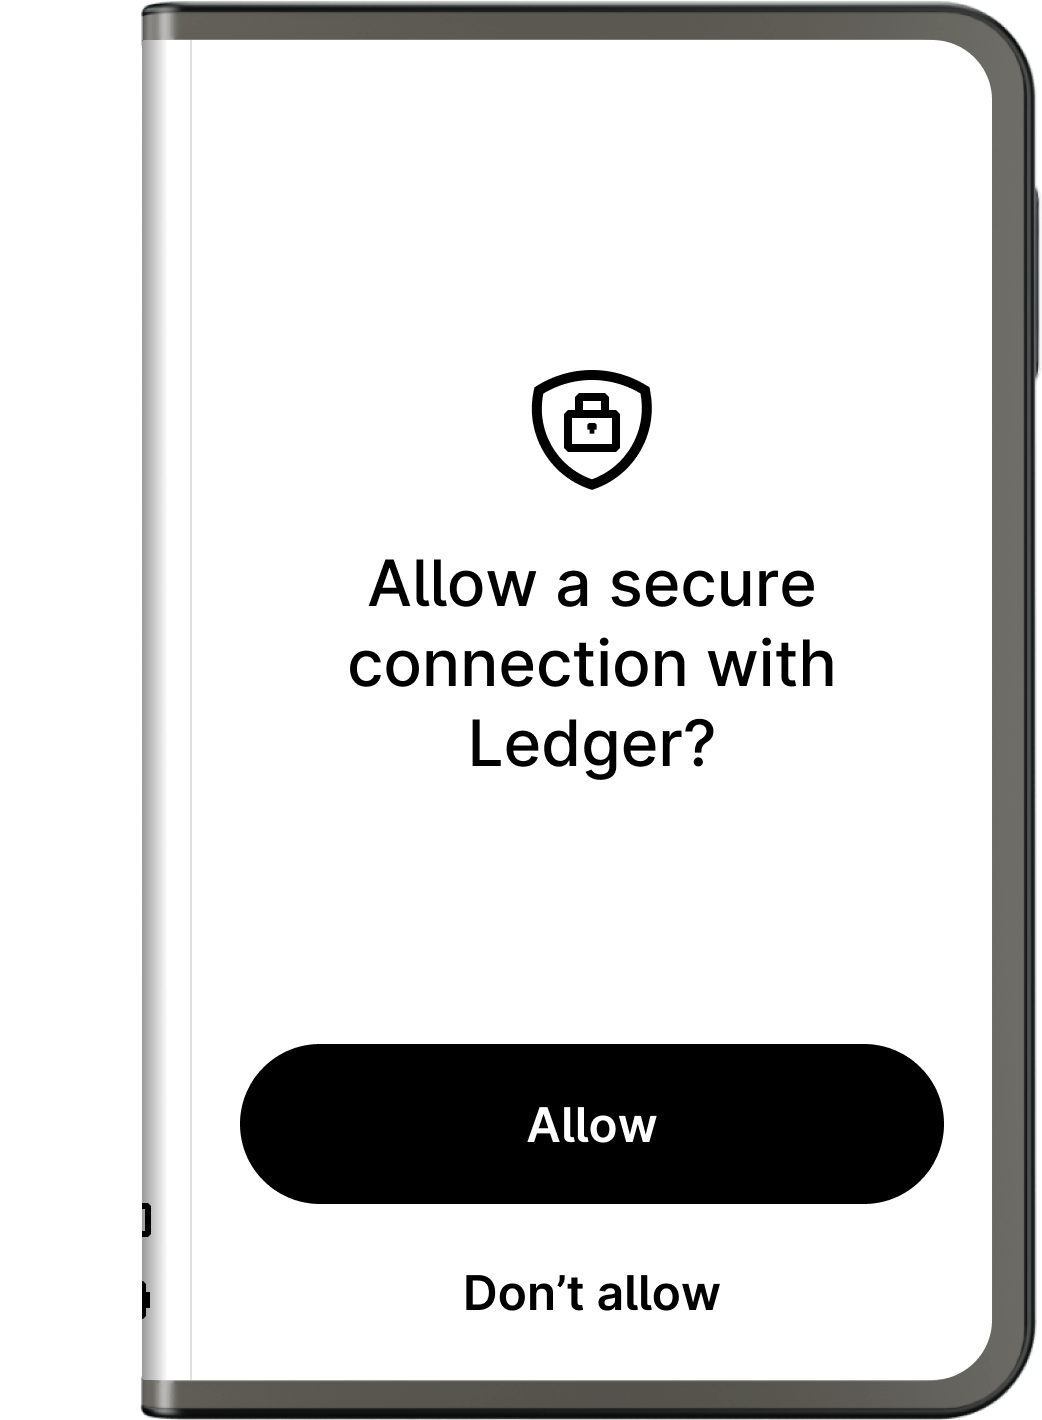
Tip
If prompted, click 'Allow' to enable a secure connection with your Ledger device.
2. Install the Solar app
Using Ledger Live’s App catalog, search for "Solar" and click ‘Install.’
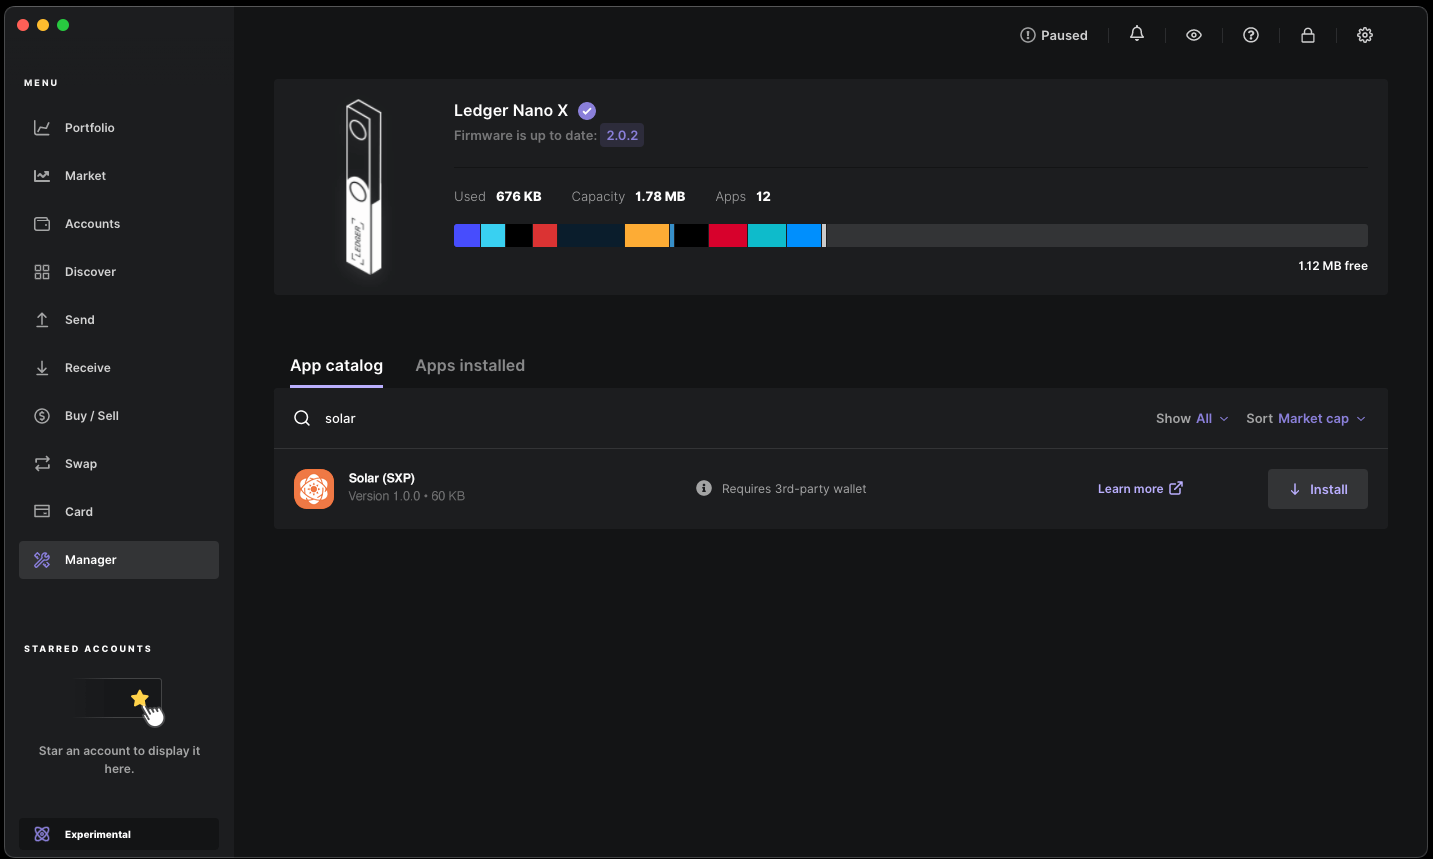
The Solar app will then be installed on your Ledger device.
3. Close Ledger Live
Viewing Solar (SXP) Ledger Wallets
After having installed the Solar app, your Ledger device is ready to be used with the Solar Desktop Wallet.
1. Close Ledger Live Desktop
Having multiple Ledger-supported applications opened at the same time on your computer can interfere with the connection to your Ledger device, so you'll want to make sure Ledger Live, or any other software that connects to Ledger devices, is closed.
2. Connect your Ledger device
If not already connected and unlocked, connect your Ledger device to your computer and unlock it using your PIN.


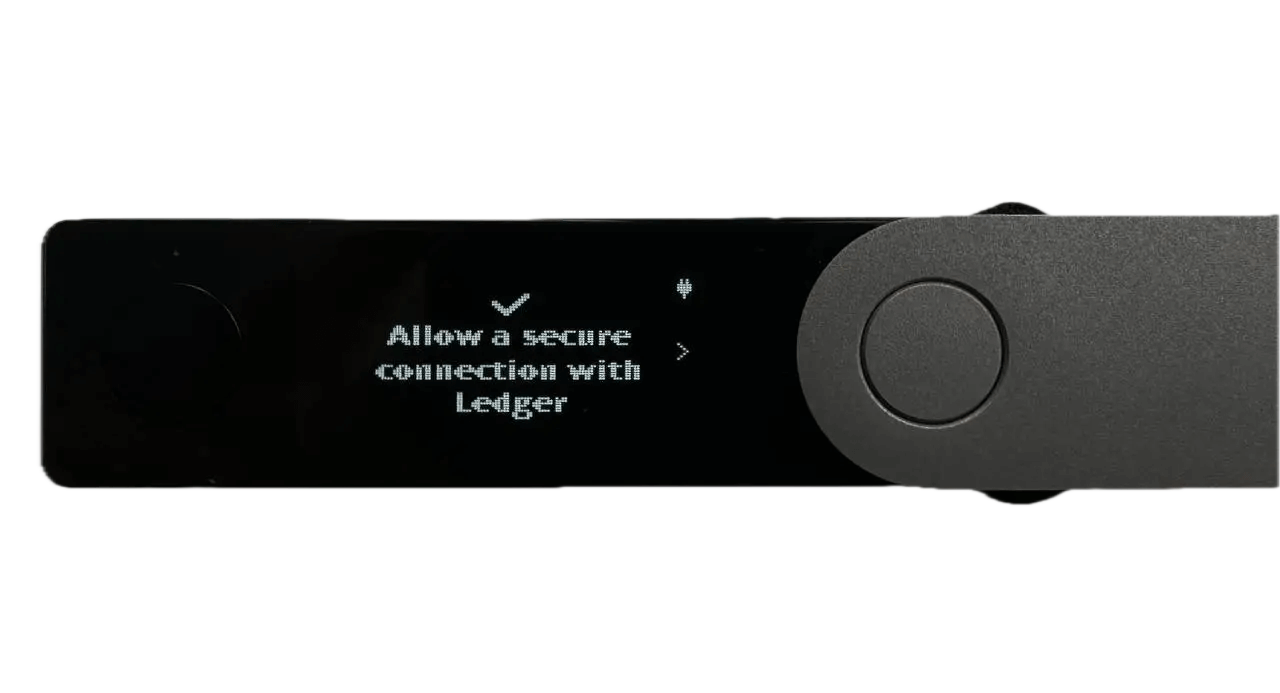
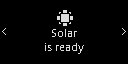
3. Open the Solar Ledger app
Next, open the Solar Ledger app on your Ledger device.
Your device's screen should look like the image below:
4. Open the Solar Desktop Wallet
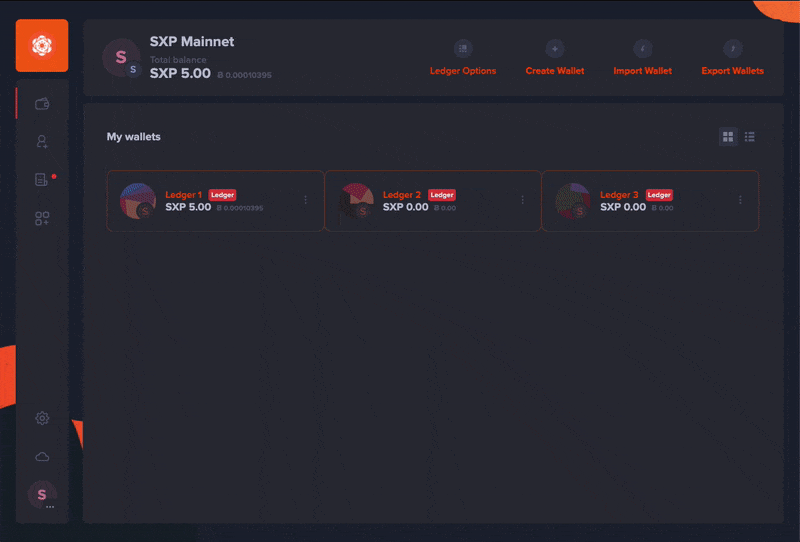
Once initialised, the Solar Desktop Wallet will load and display your Ledger wallets and their SXP balances.
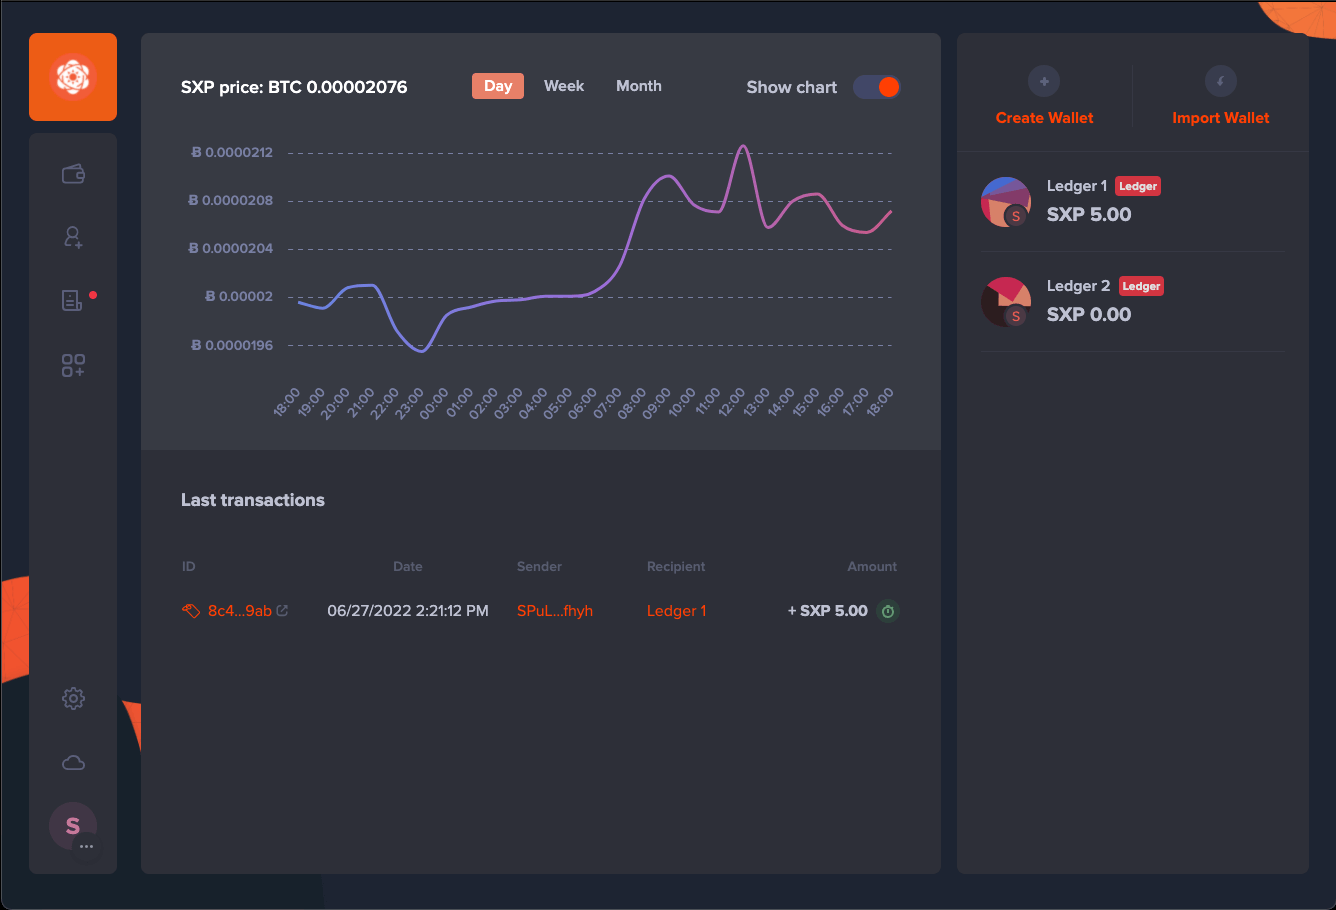
Ledger wallets are marked with a red ‘Ledger’ label.
Creating Multiple Solar (SXP) Ledger Wallets
Your Ledger device can manage multiple SXP wallet addresses using the ‘Ledger Options’ menu of the Solar Desktop Wallet.
1. Click ‘My wallets’
In the Solar Desktop Wallet, click on 'My Wallets.'
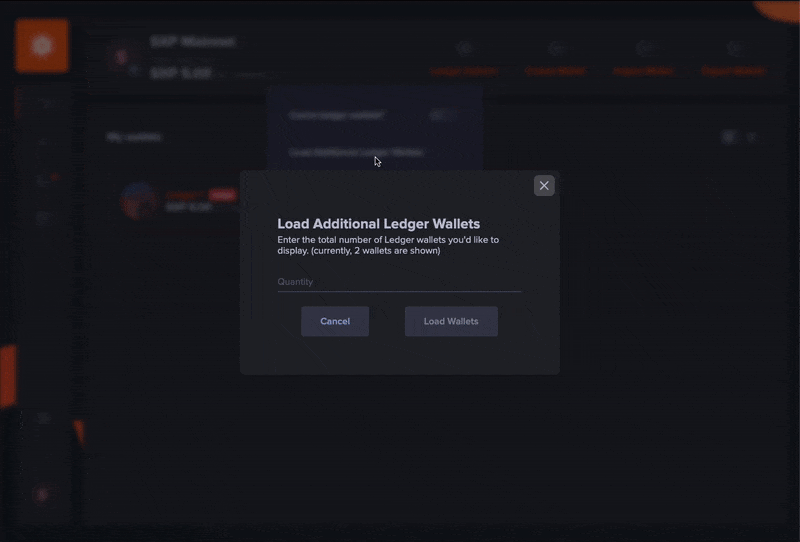
2. Click ‘Ledger Options’
Using the ‘Ledger Options’ menu of the Solar Desktop Wallet, click ‘Load Additional Ledger Wallets.'

3. Click ‘Load Wallets’
Finally, type in however many Solar Ledger wallets you'd like to have displayed and click 'Load Wallets.'
Receiving and Sending Solar (SXP)
A Solar Ledger wallet works just like a traditional mnemonic-protected Solar wallet.
Receiving Solar (SXP)
Receive SXP from anyone by sharing your unique Solar (SXP) Ledger wallet address(es) with them.
You can find a wallet's unique address in its banner as seen below.
Sending Solar (SXP)
Send SXP using your Ledger device and the Solar Desktop Wallet.
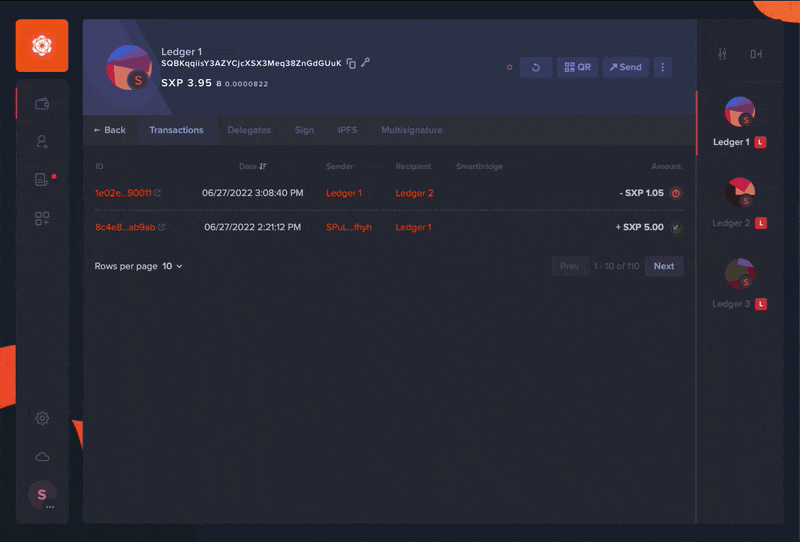
1. Open a Solar (SXP) Ledger wallet
Using the Solar Desktop Wallet, open the Solar (SXP) Ledger address from which you'd like to send funds, then click 'Send.'
![]()
Make sure your Ledger device is connected and unlocked and that the Solar app is opened.
2. Enter the Transfer Details
Enter the recipient's wallet address (or pick one from your address book) and the amount of SXP you'd like to send.
![]()
After entering and reviewing the information, click 'Next' to proceed.
![]()
3. Confirm using your Ledger Device
You will now be required to review the transaction details using your Ledger device.
![]()
Take your time verifying the transaction details.
Pay attention to the recipient address(es) and the amount of SXP shown.
Make sure all values match what you entered using the Solar Desktop Wallet.
Signing
If everything looks correct and you'd like to proceed with signing the transaction...
Touch and hold as instructed on your Ledger device.
![]()
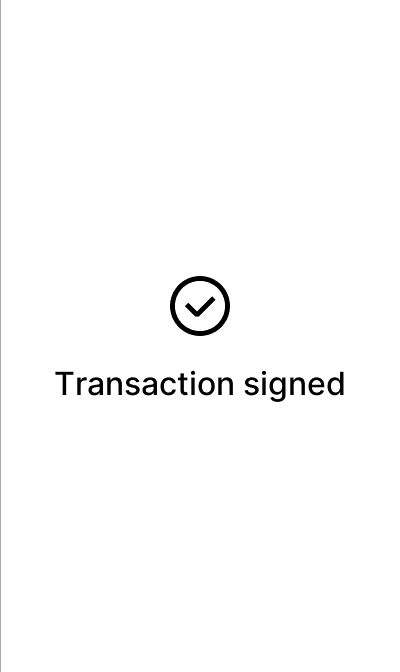
Click 'Approve' using your Ledger device.

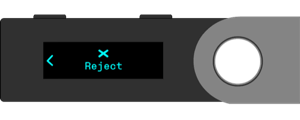
Rejecting
If the details don't match...
If you'd like to make changes...
If you've simply changed your mind and want to cancel...
Tap 'Reject' on your Ledger device, then tap 'Yes, reject' to decline signing of the transaction.
![]()


Click 'Reject' using your Ledger device.
4. Confirm and Send
After reviewing and approving the transaction details using your Ledger device, you'll have a third and final opportunity to review the transaction details before broadcasting it to the network.
If everything looks good and you'd like to proceed with the transaction, click the ‘Send’ button as shown below.
![]()
Voting / Staking Solar (SXP)
You can perform nearly any transaction using your Solar Ledger wallet as you could using a traditional Solar (SXP) wallet, including voting for your favourite block producers to stake your SXP.
Learn more about block producers and their proposals and contributions here: https://delegates.solar.org
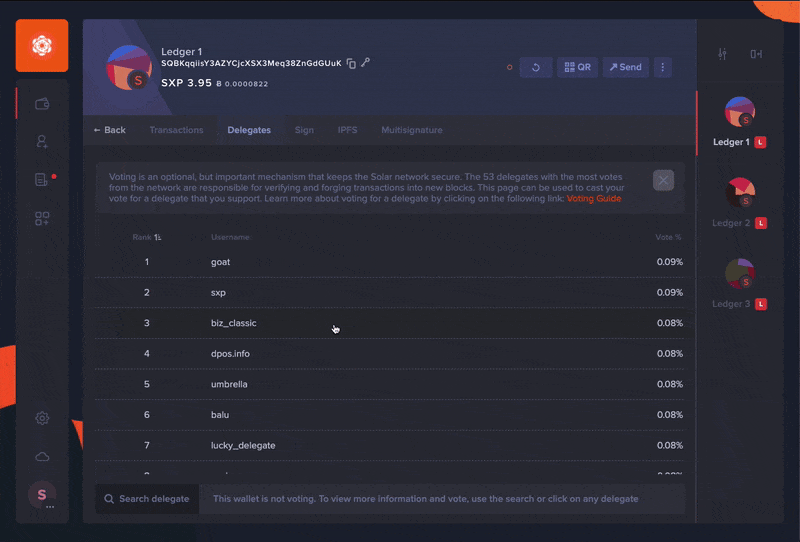
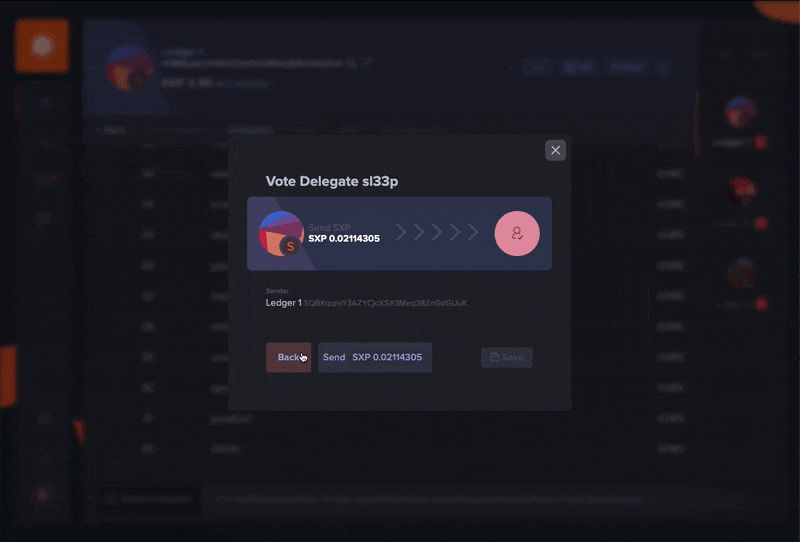
1. Open a Solar (SXP) Ledger wallet
Using the Solar Desktop Wallet, open the Solar (SXP) Ledger address from which you'd like to vote. Then click the 'Block Producers' tab.
Make sure your Ledger device is connected and unlocked and that the Solar app is opened.
2. Select your Favourite Block Producers
Select your favourite block producers from the list--or search for them by name.
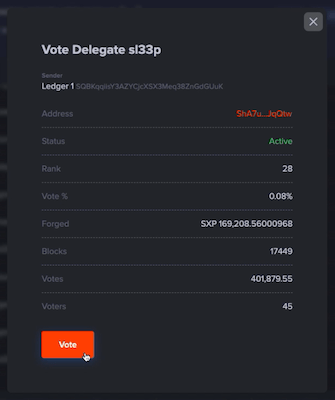
3. Confirm the Vote Details
After reviewing the vote details, click 'Vote'.
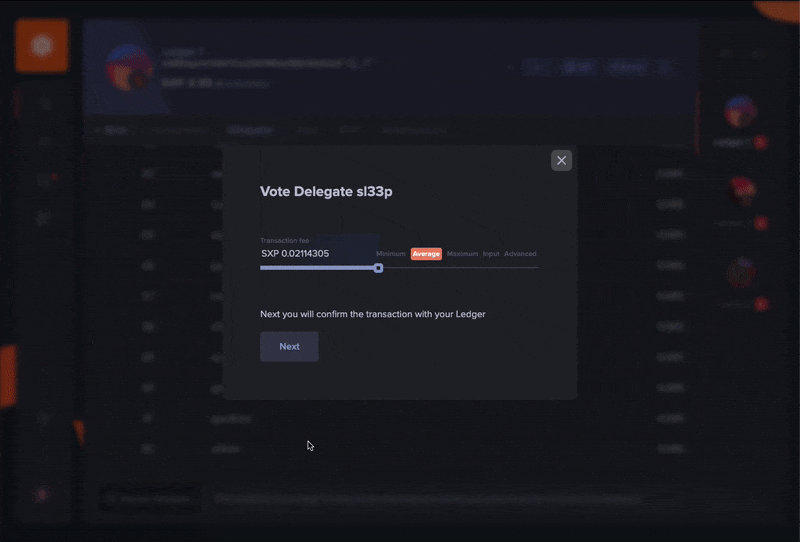
4. Confirm the Vote Fee
You'll now be asked to confirm the vote fee.
It's recommended to leave this set to the default ("Average") fee,
there's no need to adjust it at this time.
Click 'Next' to proceed.
5. Confirm using your Ledger Device
You will now be required to review the vote details using your Ledger device.
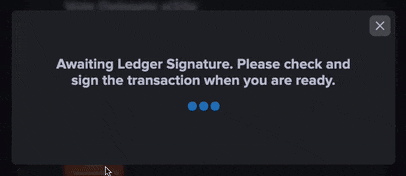
Take your time verifying the transaction details.
Make sure all values match what you entered using the Solar Desktop Wallet.
Signing
If everything looks correct and you'd like to proceed with signing the transaction...
Touch and hold as instructed on your Ledger device.
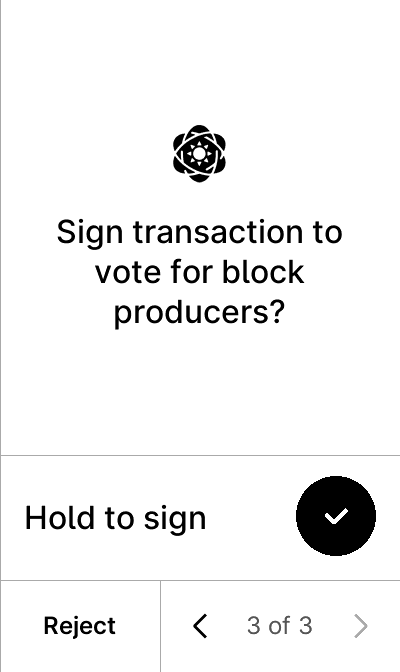
Click 'Approve' using your Ledger device.
Rejecting
If the details don't match...
If you'd like to make changes...
If you've simply changed your mind and want to cancel...
Tap 'Reject' on your Ledger device, then tap 'Yes, reject' to decline signing of the transaction.
Click 'Reject' using your Ledger device.
6. Confirm and Send
After reviewing and approving the vote details using your Ledger device, you'll have a third and final opportunity to review the vote transaction details before broadcasting it to the network.
If everything looks good and you'd like to proceed with voting, click the ‘Send’ button as shown below.
Troubleshooting
My Solar Desktop Wallet does not show any Ledger wallets
- Make sure your Ledger device is connected to your computer, that it is unlocked, and that the Solar Ledger app is opened. The screen of your Ledger device should say ‘Solar is ready.’
- Make sure Ledger Live, or any other software that connects to Ledger devices, is not opened as this can interfere with a Ledger device's connection.
- Make sure you have installed the latest version of the Solar Desktop Wallet, available here: https://solar.org/desktop-wallet.
- Restart the Solar Desktop Wallet or 'Force Reload' it using
CTRL + SHIFT + R(Windows) orCMD + SHIFT + R(Linux, macOS)
Support
If you have any questions, please reach out to the Solar community on the official Solar channels:
- Discord: https://discord.solar.org
- Telegram: https://telegram.solar.org